Scattering Assets
botaniq comes with a scattering system that can be used to spawn a predefined preset, draw vine
or create a custom preset with few clicks of a button. You can find all of the scatter functionality
in the Scatter panel. Scatter panel is further split to subpanels where the individual settings
can be found.
pps - polygoniq particle systems
botaniq scatter introduces polygoniq particle systems. Those are Blender particle systems that
are managed through the scatter subpanel. Using scatter functions to create and manipulate
particle systems ensures correct naming and enables all of the additional functions to work.
Those particle systems have names prefixed with pps_ to differentiate them from other.
Name of the particle system matches name of the instance collection and of the modifier in
modifier stack.
Why is the panel empty?
Scatter panel operators will not show up if the target object is not suitable for particle
systems. For example you cannot create a particle system on a instanced collection object,
volume, curve, etc.
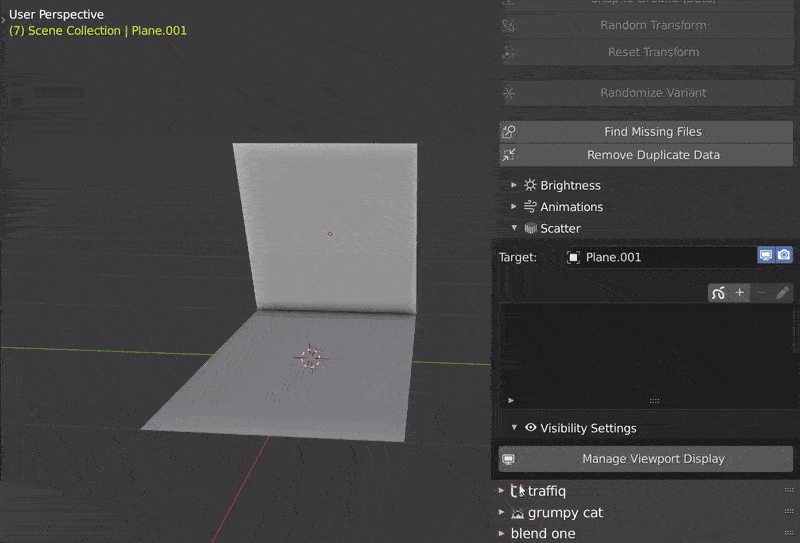
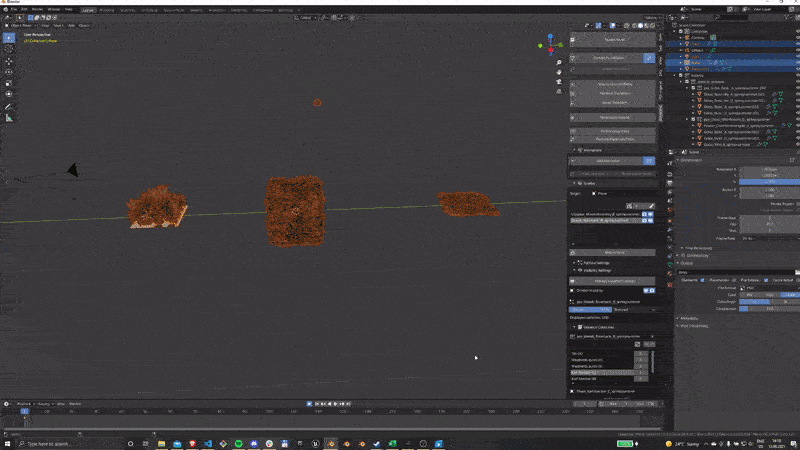
Scatter panel
Main section of scatter panel consists of target object, buttons to add (or draw), remove or rename active particle system and a list that displays all presets on the target object.
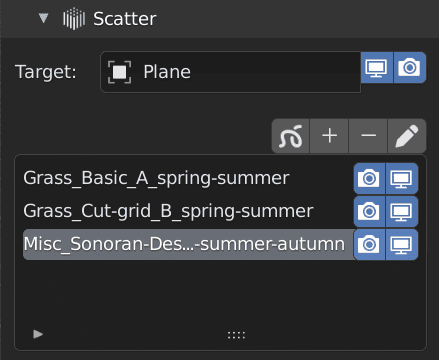
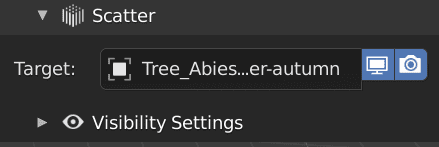
Targetis a container object for the particle systems. This object's visibility can be toggled by the buttons next to its name. Target object is the same as active object.Buttonsabove the list can be used to manipulate presets. Thevinebutton is used to draw vines.+is used to create new presets,-removes active particle system andpencil buttonis used to rename active particle system.Presets Listdisplays all the polygoniq particle systems on the target object. Visibility of each layer can be toggled for render and viewport individually.
Tip
Some botaniq presets come with multi-layer particle systems. You can create these by yourself
too. Create multiple empty particle systems and customize each layer separately. For
example one layer can contain grass, second one trees, third rocks, etc.
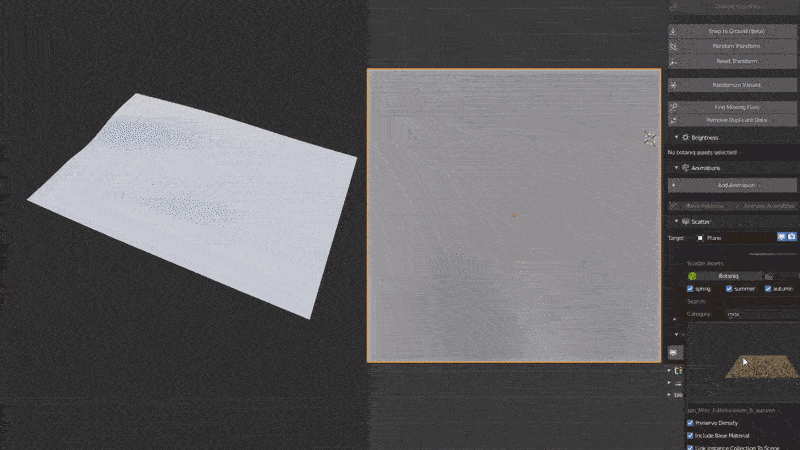
Spawning preset
Either botaniq premade particle system or a empty particle system can be spawned. Click the +
button in the scatter panel to spawn a preset.
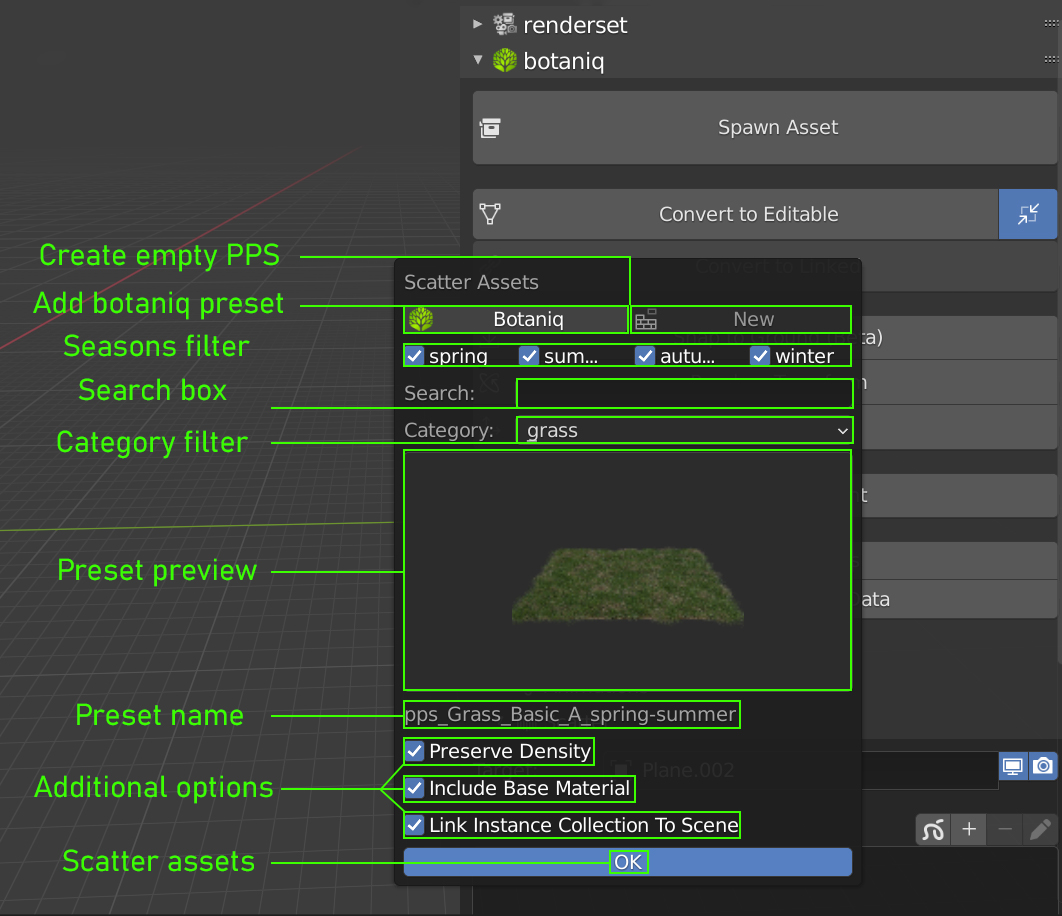
Create empty PPScreates an empty polygoniq particle system. You can add objects frombotaniqor from your scene using buttons in the objects section.Add botaniq presetspawns ready-made preset from several categories. Click thepreset previewto choose presets from selected category.Seasons, Search, Category filterscan be used to filter the presets. This is simillar to asset filtering. For more information check out the filters section of spawning assets.Preserve densitycheckbox. Each preset has a set number of models that is based on the area of the target object. If this option is on, your target object will get covered evenly regardless on its size on spawn.Include base materialcheckbox. If set to true, a base material is loaded with the particle system and added to the target object as active.Link instance collection to scenecheckbox. If this option is active, individual models that are scattered in the presets will be spawned into the scene 10 meters below the world origin coordinates(0, 0, 0). This is useful for editing the objects directly.
Draw Vine
Draw vine is a special case of a polygoniq particle system. Vines are not spawned into the scene
directly like particle systems, they are drawn using a Blender's Grease Pencil instead.
Drawing vines summary
- Click the
draw vinebutton located above the
 presets listto enter draw mode - Draw the vine using your mouse
- Select which vine asset should be spawned
- Click
convertbutton
Draw Mode Panel
This panel gets exposed when the draw vine button is clicked.
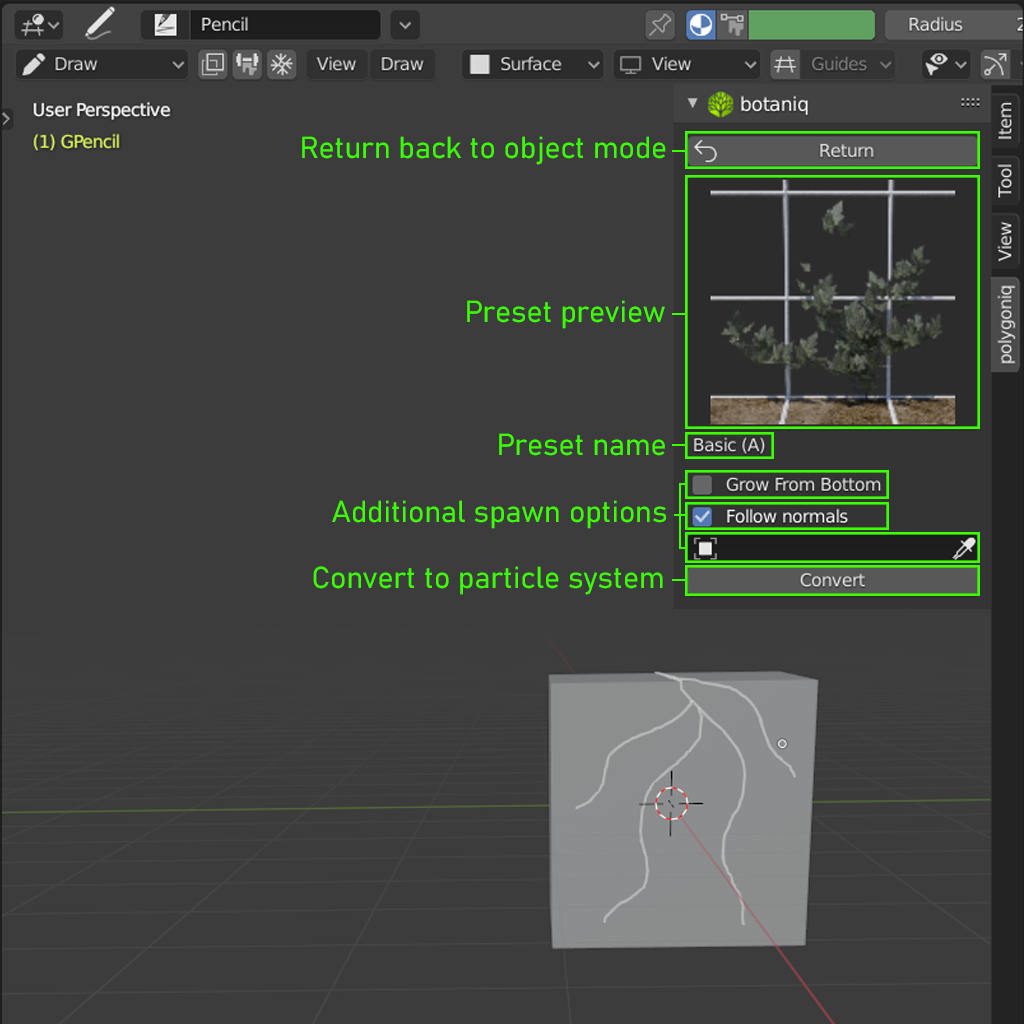
Returnbutton cancels current drawing session and returns you back into object mode.Preset previewdisplays preview image of the vine. Click the image to choose different vine preset.Preset namedescribes the type of the vine and the bracket is its variant (A, B, C, ...).Grow from bottomcheckbox. If this option is active vines will be narrower towards the ground, otherwise, they grow narrower towards the sky.Follow normalscheckbox. If this option is active leaves will grow perpendicular to theFollow normals objectfield value. This is useful when you want to have vines from multiple directions like around a tree or in a corner of a building.Follow normals objectdefines object of which normals should the leaves follow. Only works whenFollow normalsis active.Convertbutton converts the grease pencil into a vine particle system.
Vine Settings
When the target object contains vine particle system, then additional settings will be exposed.
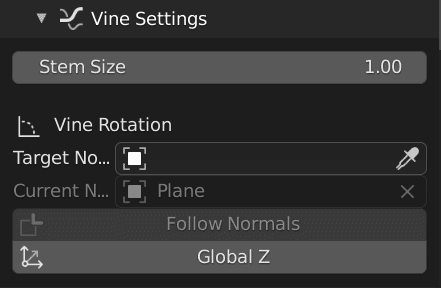
Stem sizeproperty can be used to tweak the size of the vine stem.Target Normalsfield can be used withFollow Normalsto change the object which normals are being followed by the leaves.Global Zsets the normals to follow theZaxis.
Vine settings are not showing
Drawing vines creates a new object that contains the particle system. This object is selected
for you after using the convert button. If you want to show settings again you have to click
the newly created object again.
Particle Settings
Subpanel containing convenient and useful settings from particle systems at hand.
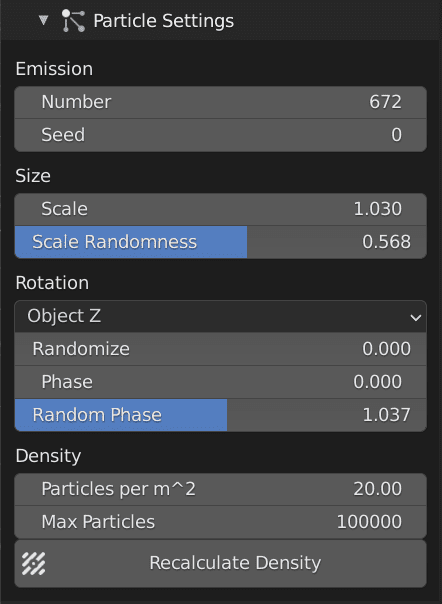
Numberis a count of particles generated on the object.-
Seedproperty randomizes the distribution. -
Scaleresizes all objects in the system. -
Scale Randomnessintroduces random factor into the scale. -
Orientation axisdefines how the objects should be rotated. Generally you will need two options.Ground Zwhere objects rotate around vertical axis. And aNormaloption which rotates the particles rotate around the normals of the object. Randomizeis an random offset from the orientation axis.Phaseis a rotation around the chosen axis.-
Random phaseintroduces some random offset into the rotation around chosen axis. -
Particles per m^2can be used to set the number of particles that will appear on 1x1m area. Max particleslimits the number of particles for theRecalculate densitybutton.Recalculate densityautomatically recalculates the density based on the area of the underlying mesh depending on theParticles per m^2value. Useful after scaling emitter.
Visibility Settings
Subpanel that can be used to tweak viewport visibility settings of polygoniq particle systems across the scene or for the active particle system.
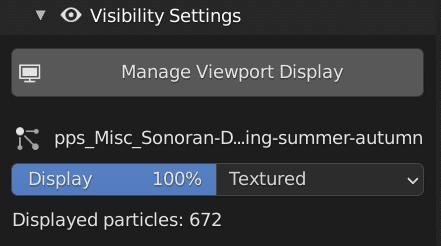
Displaylets you choose how much particles to display in percents.Display asallows selecting how the instanced objects are displayed in scenes.Displayed particlesis the count of currently displayed particles.
To manage viewport visibility across the scene you can use the Manage Viewport Visibility
operator.
Tip
Visibility settings are useful to optimize viewport performance. To maximize performance set
the display to the minimal feasible number and the display as to wireframe. This will not
affect the render at all.
Weight Painting
botaniq comes with simplified weight painting to enable even more precise customization of the
particle system location.
 There are two weight painting options. You can either paint
 density or length. Clicking the
brush button to corresponding option enables weight paint mode.
More information about weight painting (brushes, vertex groups, ...) is available in the official blender documentation
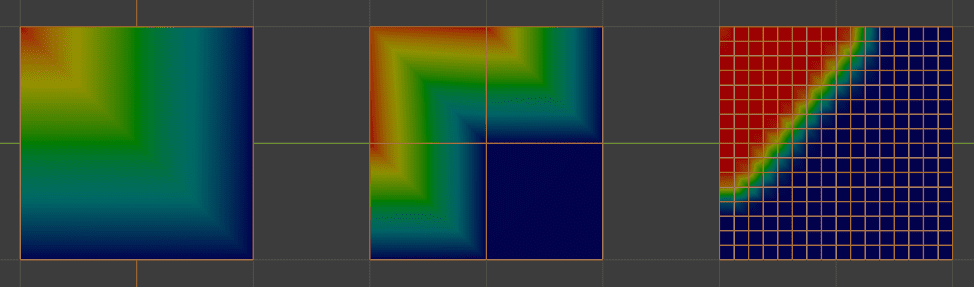
Warning
In order for weight paint to work properly you must have the target object subdivided enough as
each vertex carries information about how many objects should spawn near it. (Red=Density 1,
Blue=Density 0)
Objects (Instance collection)
Subpanel that contains information about all of the objects in the instance collection from where objects are being scatter.
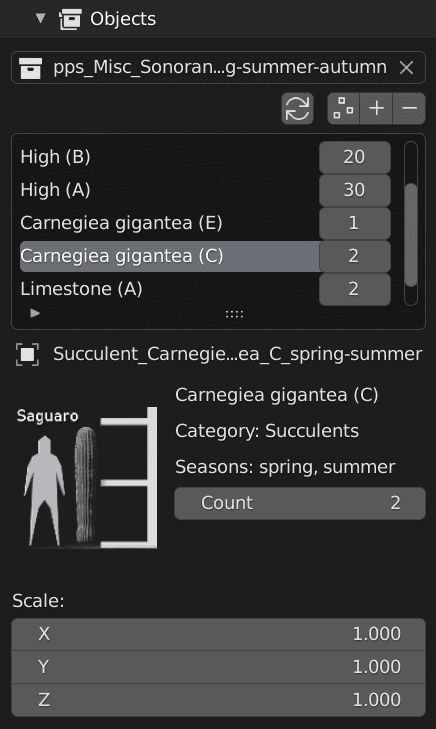
Refresh/Add/Removecan be used to add and remove botaniq assets into the activeppsusing the+and-buttons. Use refresh if you edited the collection contents yourselves.Asset countrepresents the chance of the object in collection being generated. For example, if you set object A’s count to 10 and object B’s count to 1, there is a 10:1 chance that object A will appear. In praxis, this means you will have 10 models of grass for every 1 model of a flower.Previewis displayed for the selected asset as well as description of the seasons so you can judge which assets fit into the particle system easier.Scalecan be used to manipulate the scale of the individual objects.