Render Context
Renderset revolves around the concept of render contexts each storing their own scene state. They are
stored in the .blend file and load up on any computer with renderset. This allows storing several
render setups in one file and switching between them reliably.
Motivation
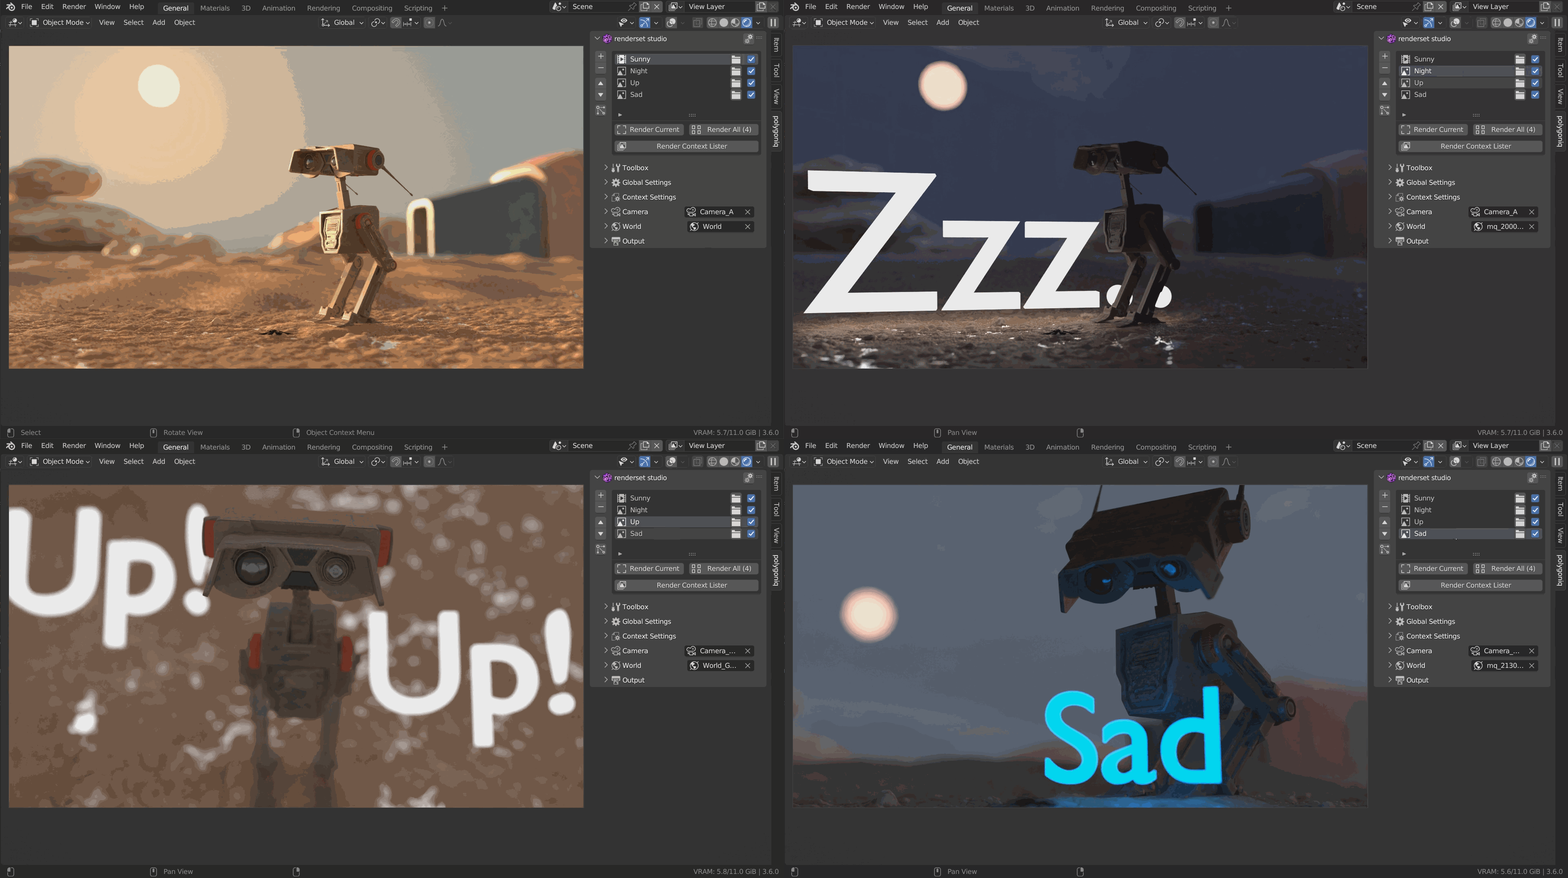
Here is an example of a production scene using renderset. We can render various views of the same scene in various light - daylight, dusk, etc... And store all of it in one blend. We can even set separate samples or resolution settings for each view.
This lets us change the scene and re-render everything without manually inputting HDR, resolution and other settings. This can be a huge time-saver for production scenes.
You can create up to a thousand contexts in one .blend file. Selected settings you change in Blender
will be stored in the active context. That way you can quickly switch contexts and it switches various
settings. This allows for multiple render and scene settings in one .blend file.
Users sometimes call contexts 'rendersets'
It is common for renderset users to call these contexts "rendersets". For the purposes of this documentation we will call them "render contexts" to avoid confusion with the addon itself.
Which Settings Are Stored
Each context remembers and stores:
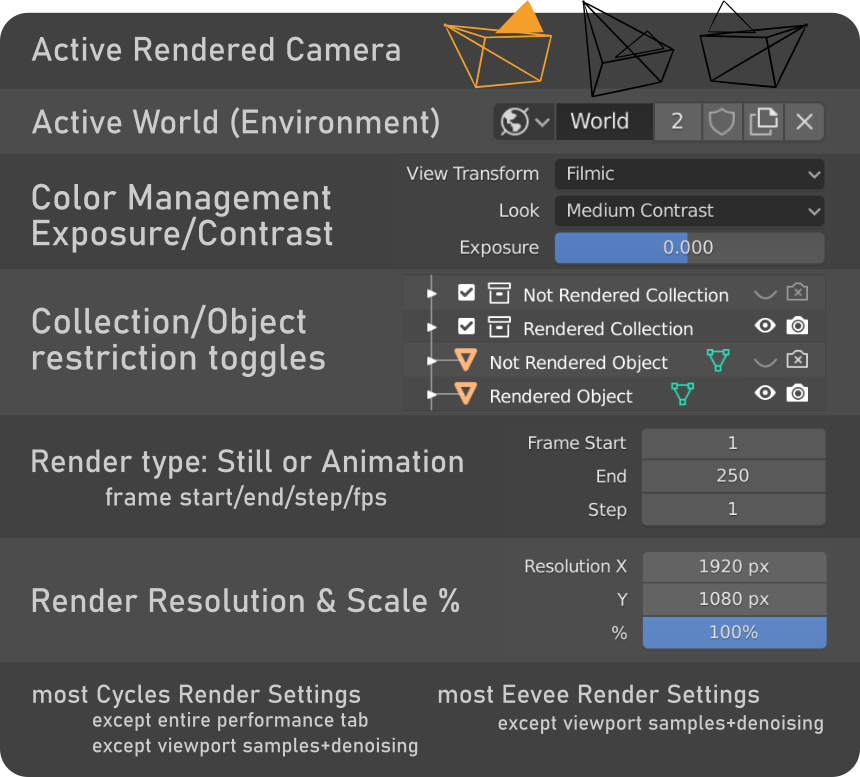

- active Camera
- active World (HDR, environment)
- visibility and restriction toggles of collections (exclude, holdout, indirect only, hide viewport)
- (optional, if enabled in Preferences) visibility and restriction toggles of objects
- color management, exposure, contrast settings (filmic, exposure value, look)
- render type: still or animation
- frame start, end, step, frame rate (in FPS)
- render dimensions (resolution in pixels) & scale percentage
- most Cycles render settings
- except the entire performance tab
- except viewport samples and viewport denoising settings
Collection visibility per context

Collection visibility management is probably the most important feature of renderset. You can set up which collections are visible per context. This enables a ton of flexibility for various workflows - archviz scenes, product visualization, board game characters, you name it!
Debug settings shows raw contents of each context
This is only for advanced users. Go to Edit → Preferences → Addons, select renderset and check the "Debug enabled" checkbox.
This will add a new row in the renderset panel called "Show values", if you expand it you will see the raw data each context contains. This can be useful if you have a lot of contexts and need to figure out what exactly they contain.
In general the render context stores everything except performance tunables because you usually want to change those for all render context at once.
Active Context
Changing Remembered Settings in Blender when renderset is active will only affect the currently active render context.
Renderset makes sure that exactly one context is active at all times. You cannot remove the last
context in the .blend and you cannot make two contexts active at the same time.
Adding New Contexts
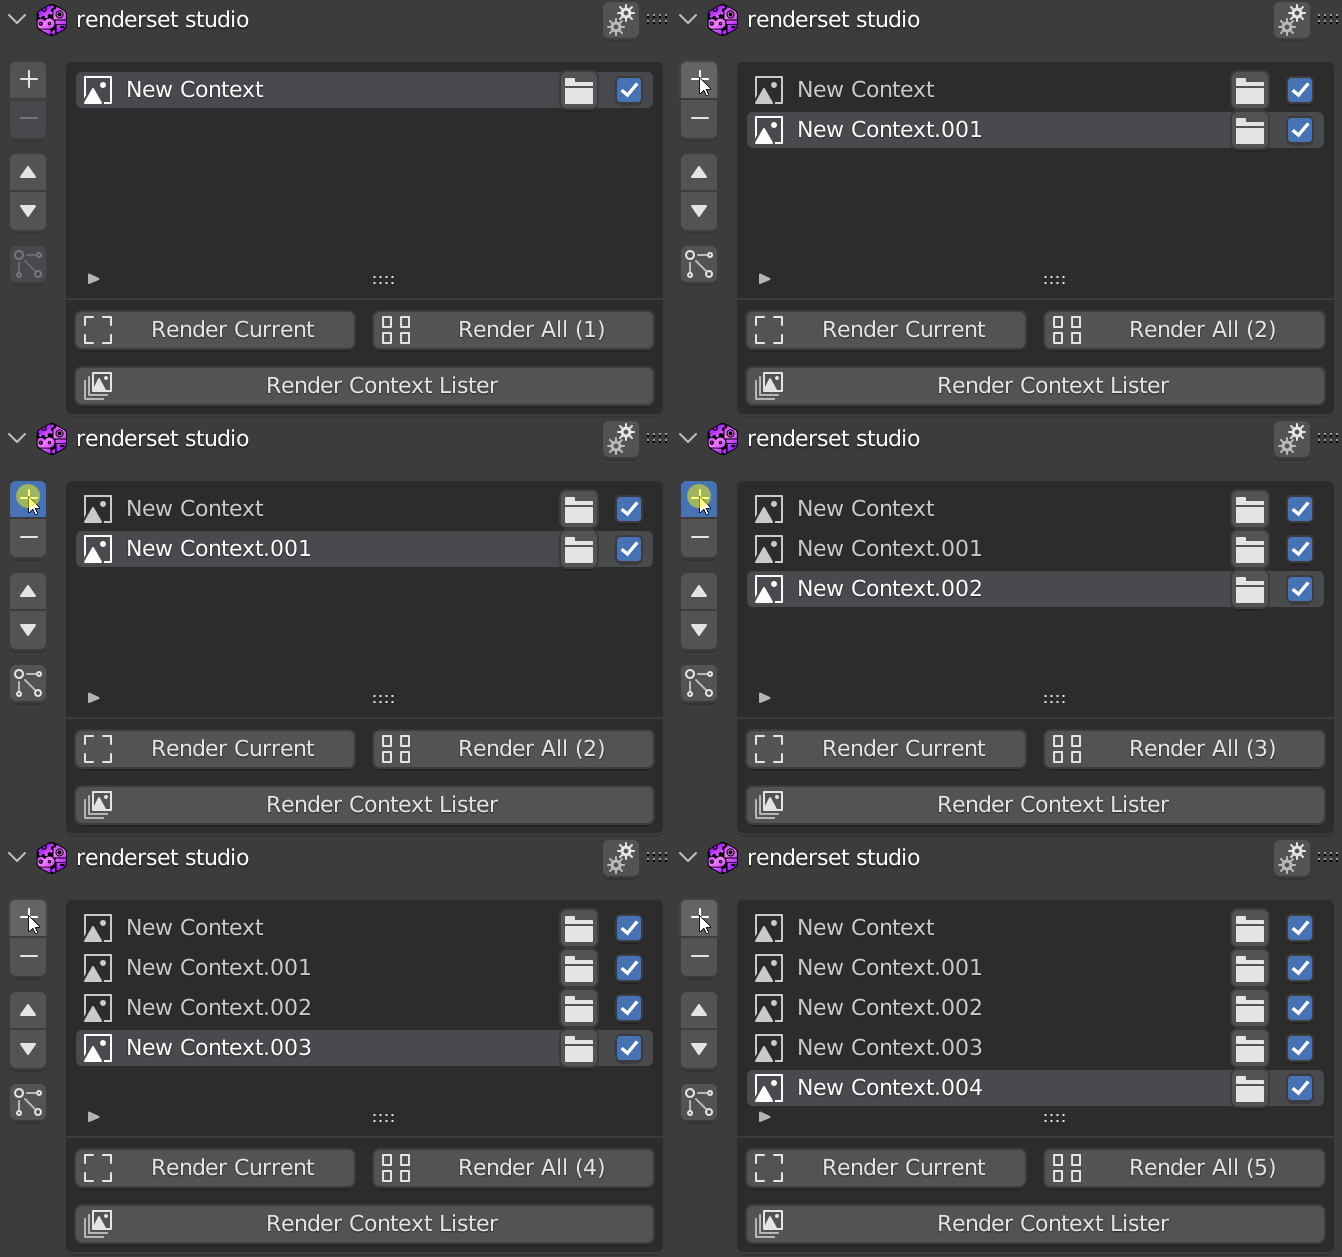
You can add a new context by clicking the + button on the renderset panel. It will have the same
settings as the currently active one. The newly added context will always be placed under the selected
already existing context.
Name your contexts
It is a good practice to name the context immediately after you create. It is much easier than trying to figure out later what the context was for. Since contexts remember a lot of information it is not viable to go through it all.
Context per Selected Camera
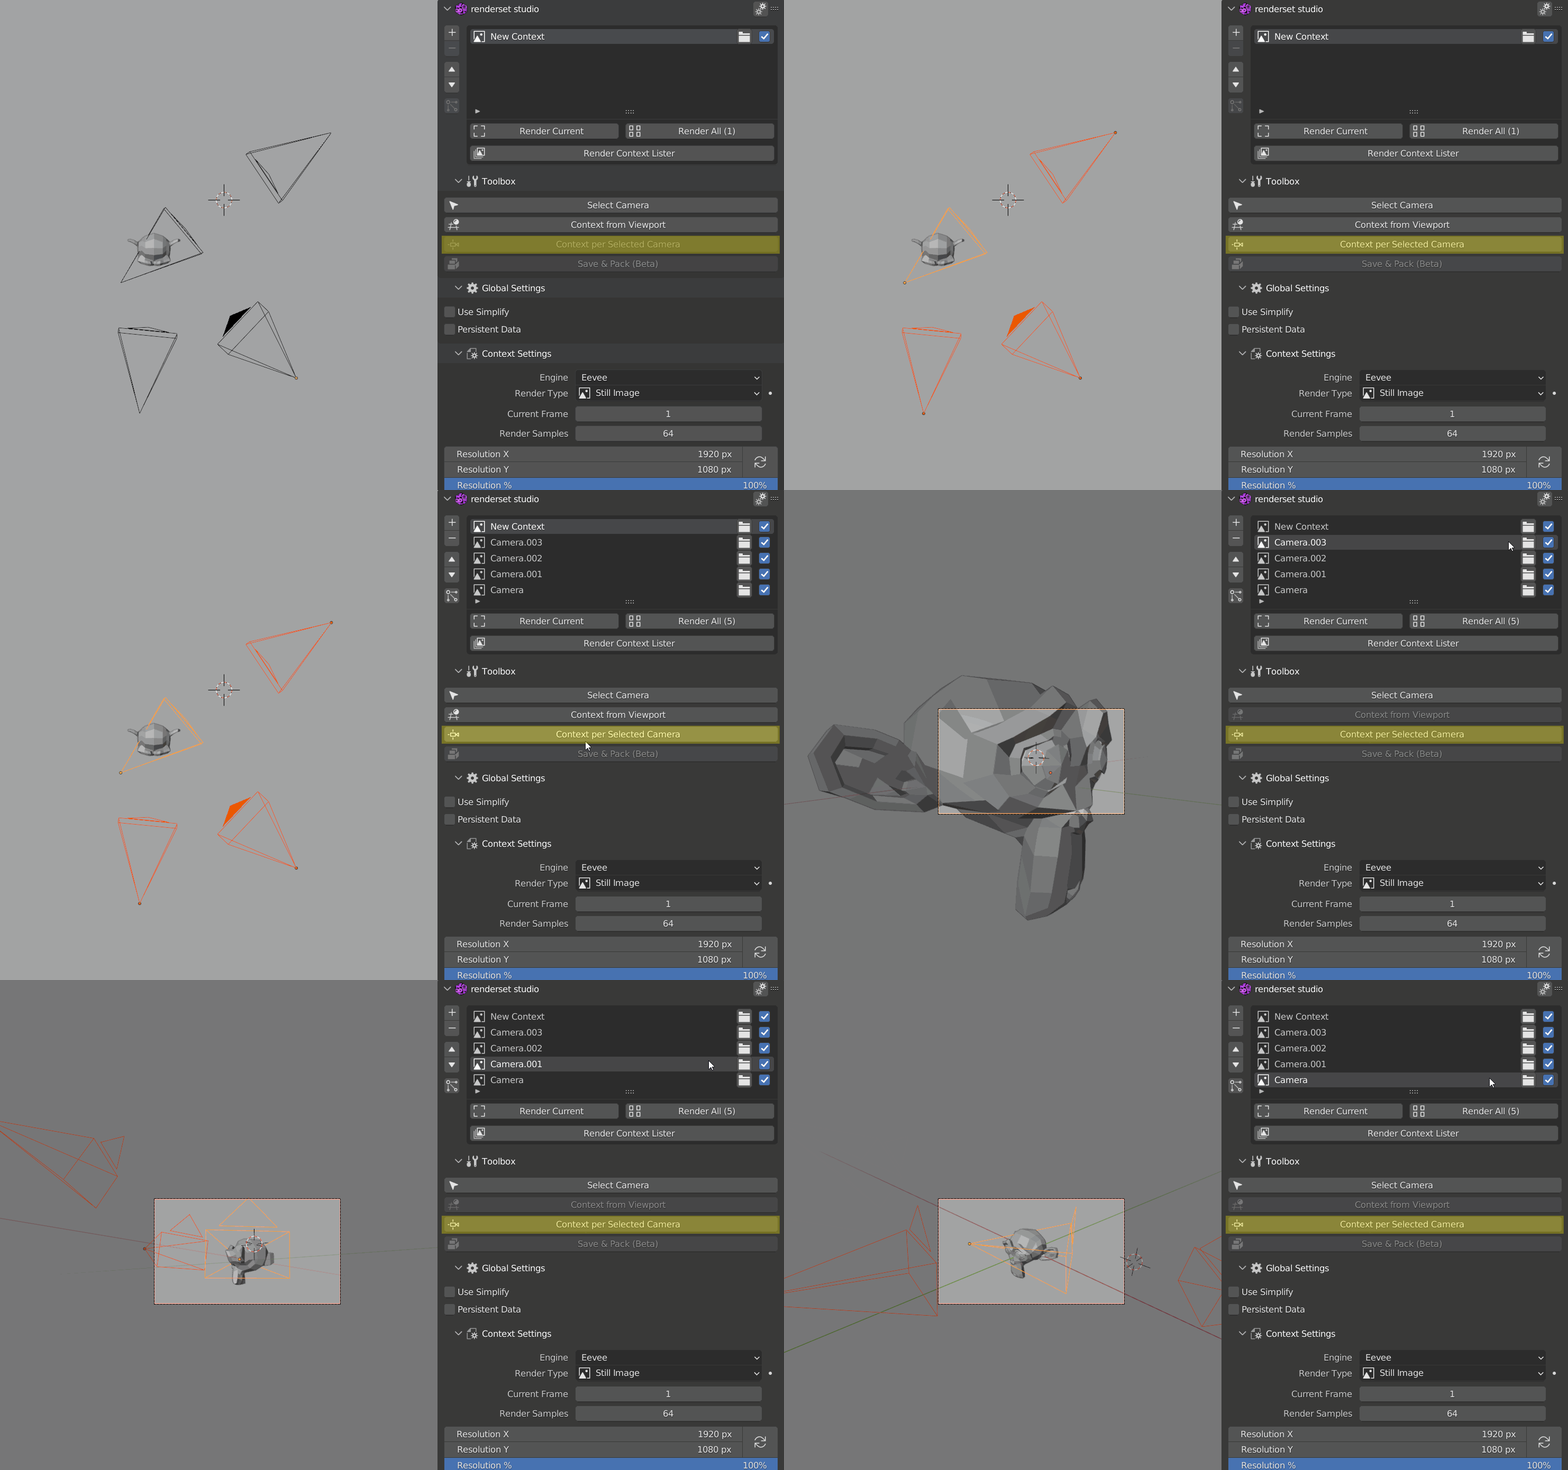
Very often you may want to add several contexts, one per camera. Renderset allows this with the
Context Per Camera button. Clicking it adds one context per selected camera.
The contexts will be named after their respective cameras.
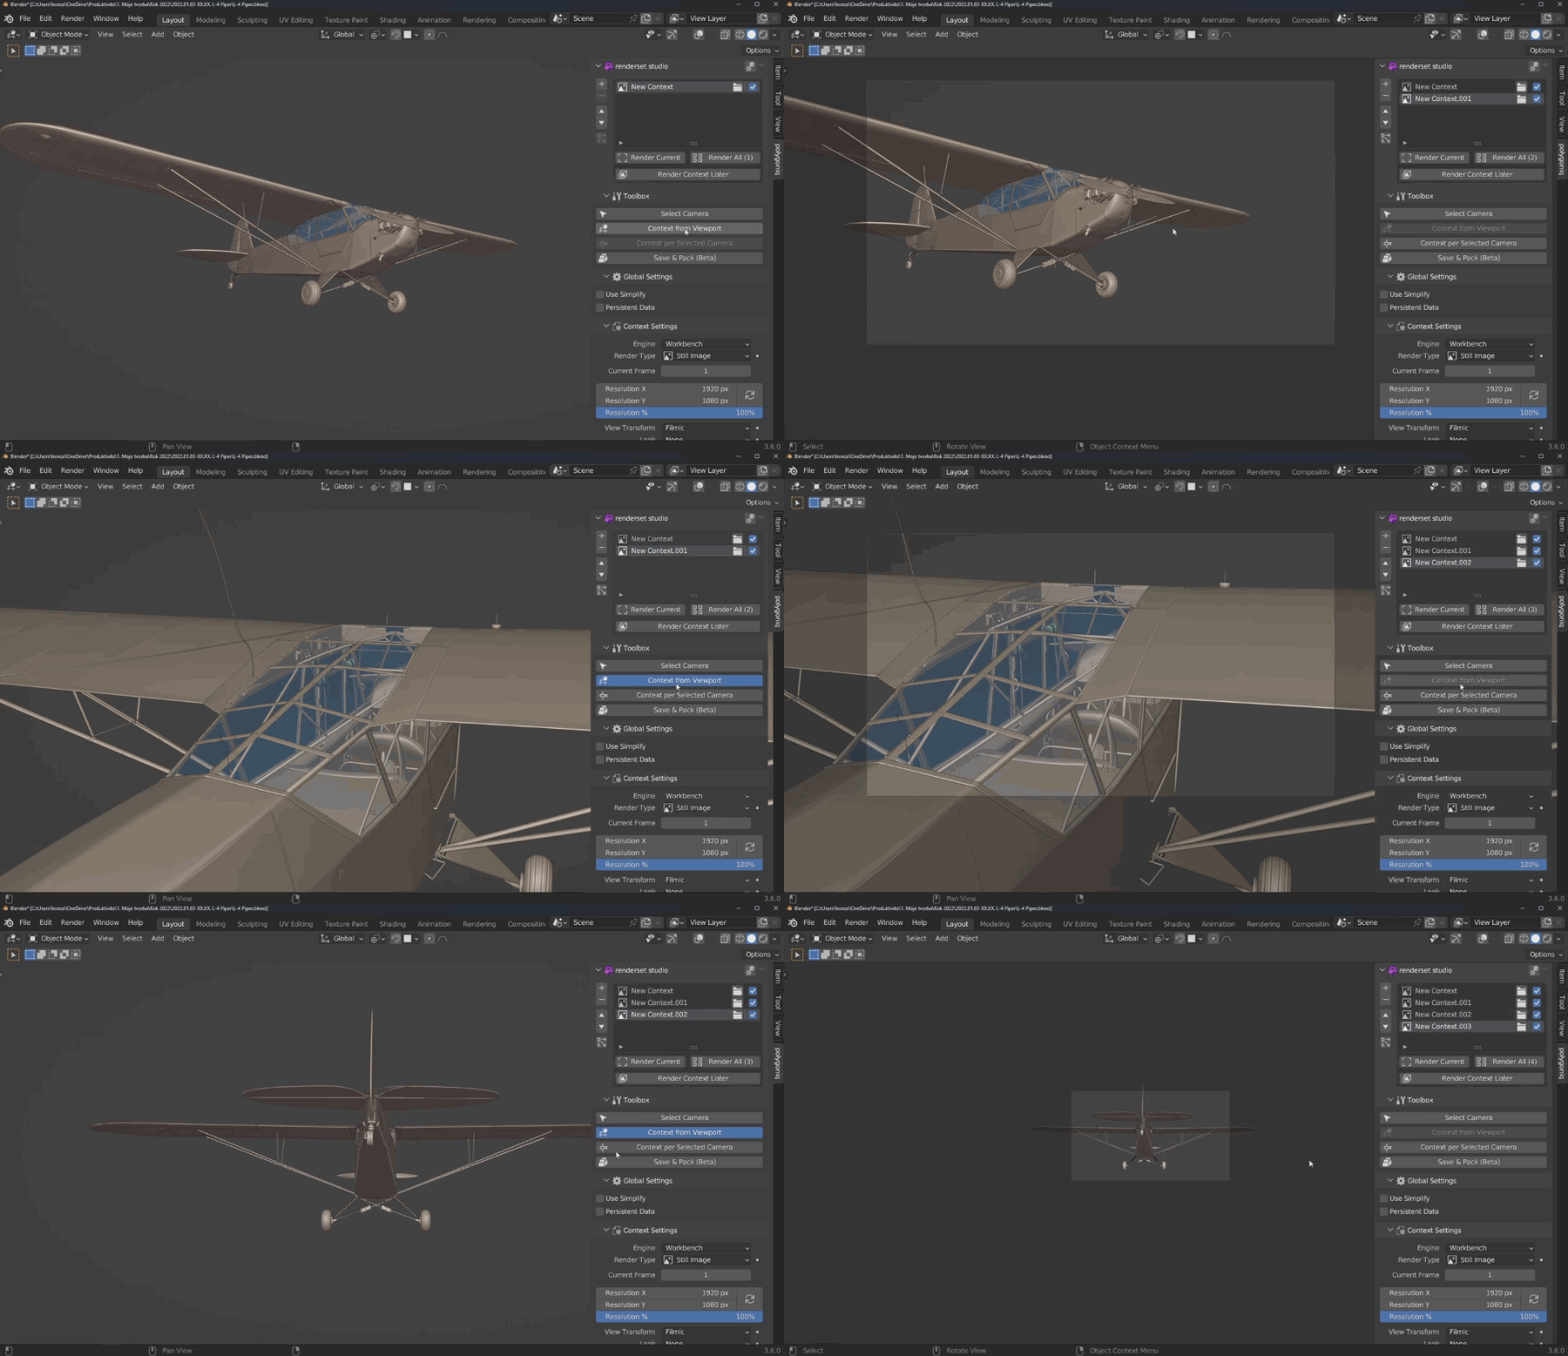
Context From Viewport
Operator that creates a camera and context from your current viewport location.
Deleting Contexts
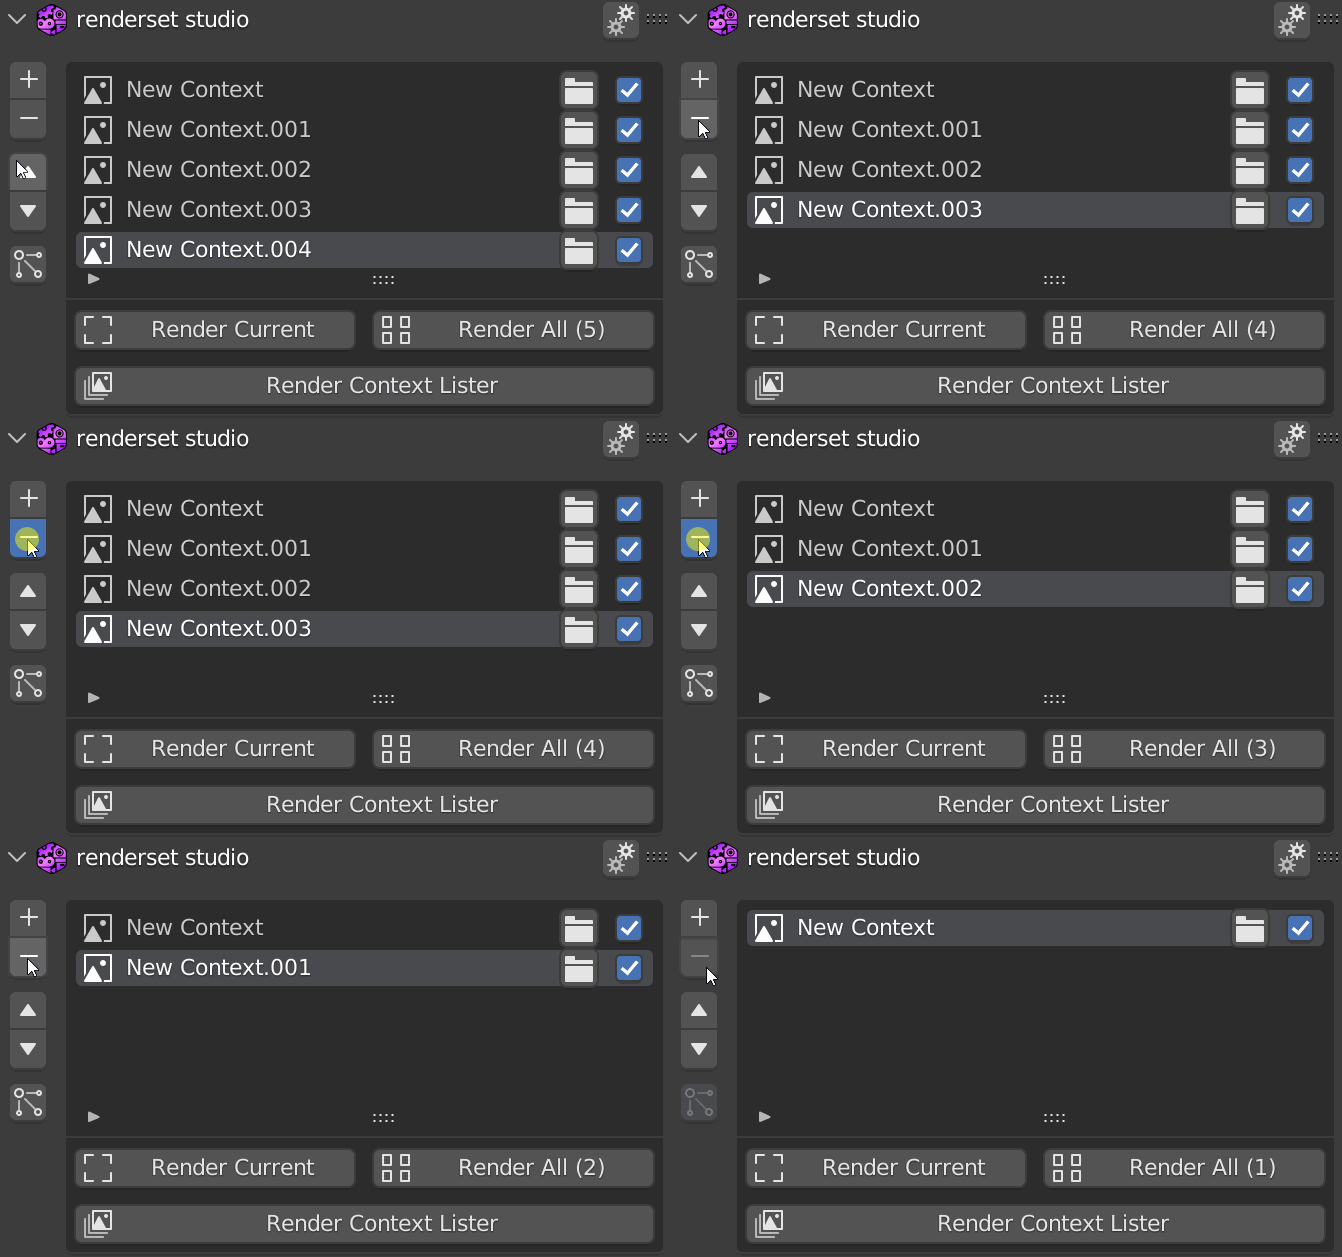
The - button deletes the selected render context. You can always take this action back via undo.
Because renderset requires exactly one context active at all times you will not be allowed to delete
the last context in the scene, the button will be grayed out.
Does not delete resources associated with the context
This only deletes the context. Any resources - camera, world, ... - associated with or remembered by the context are kept and not deleted. You have to delete them separately.
Listing All Contexts
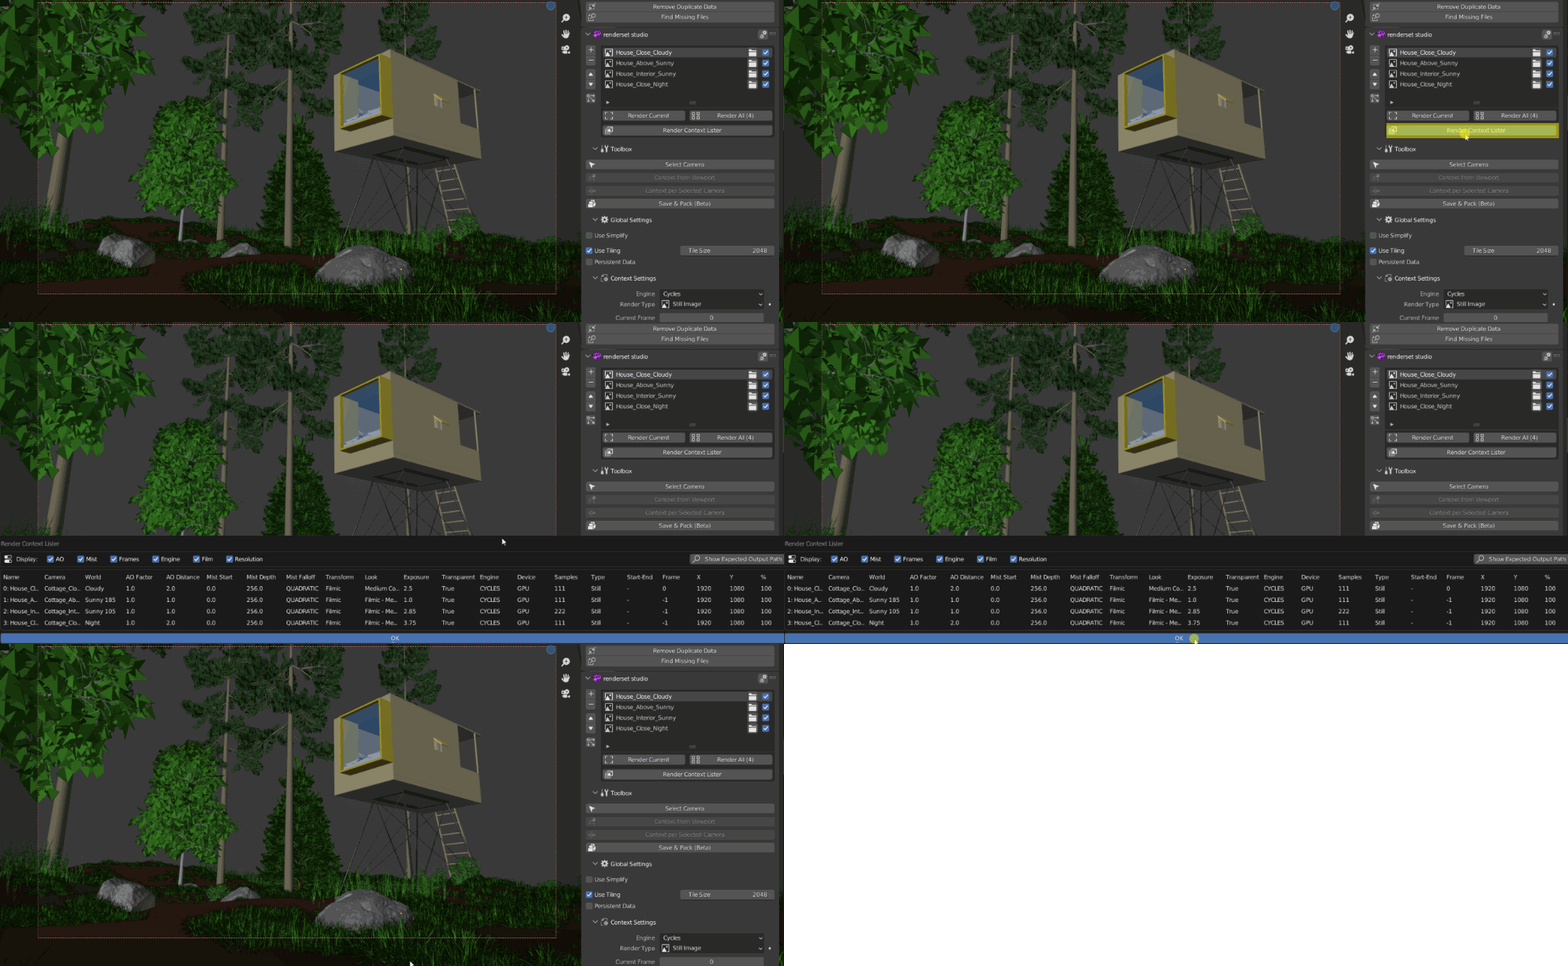
Use the Render Context Lister button on the renderset panel to get overview of all contexts. While
this does not show all the settings it shows most of them and is a good way to double check all
settings. We recommend looking through this before you burn a lot of electricity rendering a ton
of contexts.
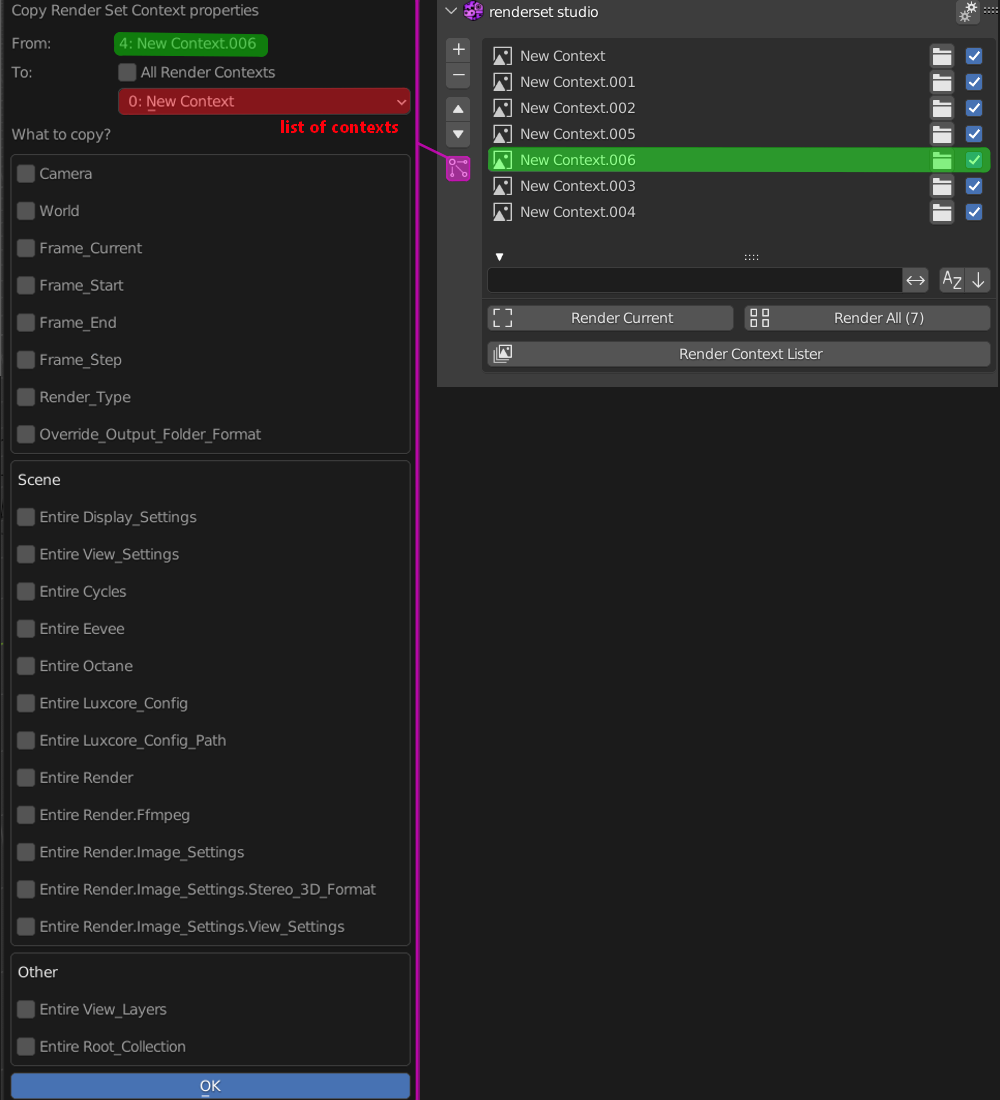
Copy renderset Context Properties
This function allows you to copy context properties from one context to another. This is particularly handy for tasks, where you need to edit multiple contexts at once like setting samples, replacing world or adjusting length of animation
