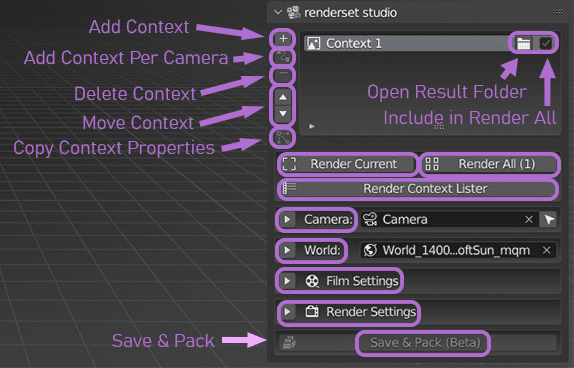
Panel Overview
The renderset panel is located on the right side of the 3D viewport window. It is the main way
to access renderset features. To access the side panel press the N key on your keyboard
and select the polygoniq tab.
Info
If you have multiple polygoniq add-ons enabled they will all be shown here.
Warning
If you do not see the panel or do not see any panels at all, check that renderset is enabled in
Preferences → Addons and you are in Object Mode. Usually you can press Tab to switch
between modes.
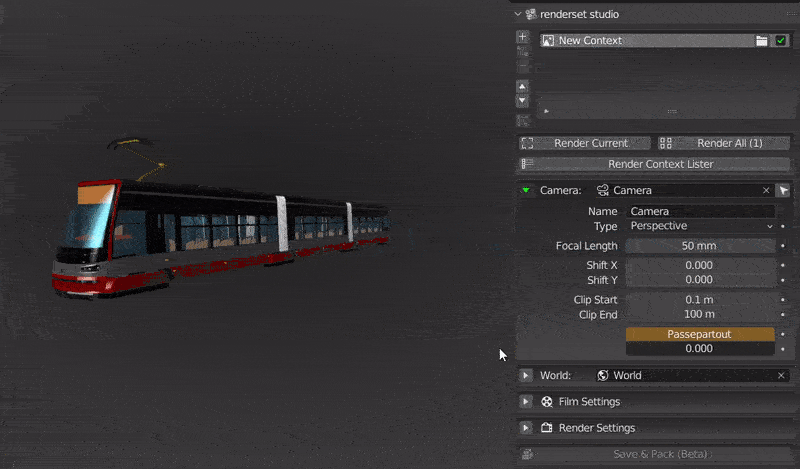
Quick Access To Camera Settings
Renderset shows some camera settings in the panel for quick access. All of these settings can be changed in Blender's native GUI. Since some are tweaked extremely often when using renderset we chose to provide quick access GUI for them.
We will go over basics of some of these. Please check out the Blender camera documentation for a more in-depth explanation.
Focal Length
Changes the distance between the optical center of the lens and the camera's sensor. This affects field of view and zoom. Longer focal lengths result in a smaller field of view (more zoom), while short focal lengths allow you to see more of the scene at once (larger field of view, less zoom).
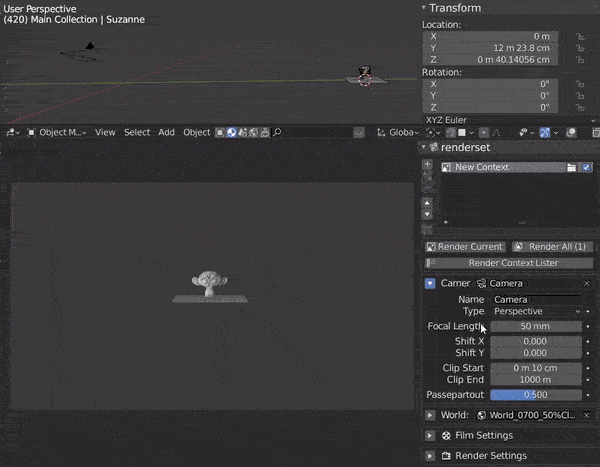
Shift X/Y
Moves the field of vision of your camera, without changing perspective. Allows for the adjustment of vanishing points. Vanishing points refer to the positions to which parallel lines converge.
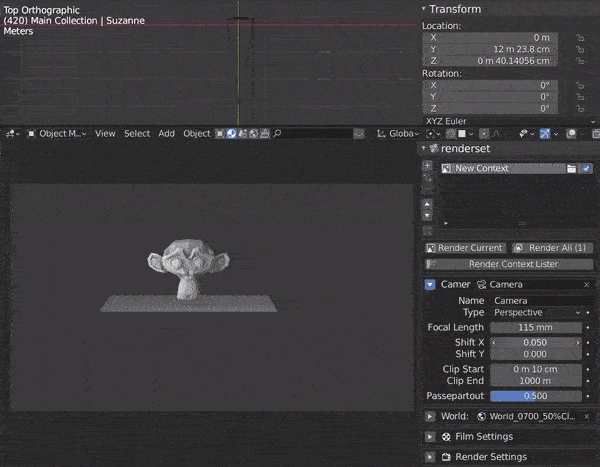

Clipping
Changes how close objects can be to the camera before they are clipped. Any objects outside this range still influence the image indirectly, as further light bounces are not clipped.
This is useful for making sections and rendering small premisses.
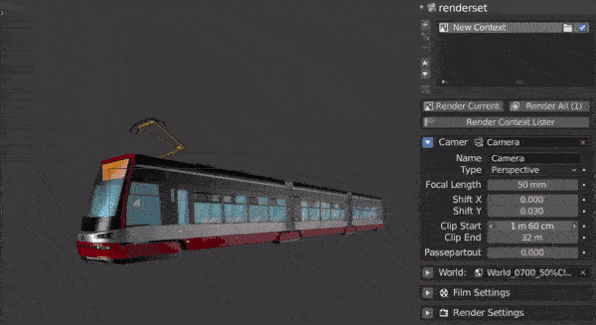
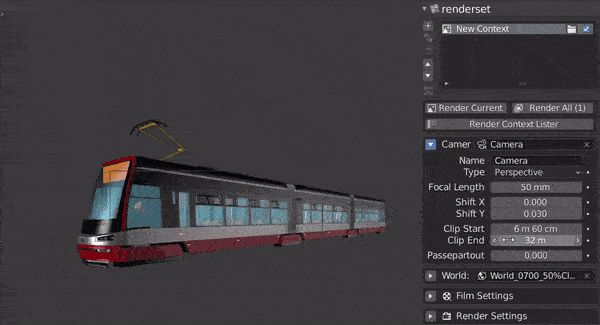
Passepartout
Changes the opacity of the darkened overlay in camera view.
Quick Access To World Settings
Renderset shows a few world settings in the panel for quick access. All of these settings can be changed in Blender's native GUI. Since some are tweaked extremely often when using renderset we chose to provide a quick access GUI for them.
We will go over basics of some of these. Please check out the Blender world settings documentation for a more in-depth explanation.
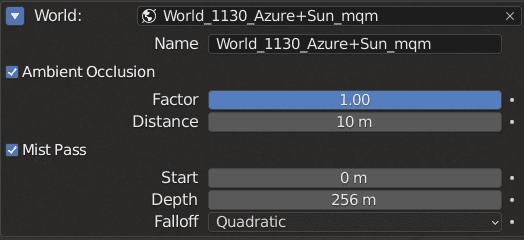
Name
You can edit the name of your World here.
Ambient Occlusion
Turns the ambient occlusion ON and OFF. Ambient occlusion calculates how exposed each point is in a scene to ambient lighting. More about ambient occlusion can be found in the Blender ambient occlusion documentation.
Mist Pass
With mist enabled, objects farther away become more transparent, merge more with the background color. The further away the object is, the more transparent it becomes. This creates an illusion of depth in the scene. More about mist in Blender can be found in Blender mist documentation.
- Start: the distance from your camera, where the Mist Pass begins influencing object transparency
- Depth: the distance from your camera, where the Mist Pass no longer influences object transparency
- Fallof: decay rate of the mist, mathematical function that influences the rate of mist over distance
Quick Access To Film Settings
Renderset shows a few film settings in the panel for quick access. All of these settings can be changed in Blender's native GUI. Since some are tweaked extremely often when using renderset we chose to provide a quick access GUI for them.
Check out the official Blender film documentation for more details.
View Transform
Change color management to achieve a different visual style of your render. You can choose from:
- Standard
- Filmic
- Filmic Log
- Raw
- False Color
Look
Manage the contrast settings of your scene.
Exposure
The amount of light entering the camera sensor (affects brightness). Different from the Exposure option found in the Color management panel, this exposure option works on the data while the Color management exposure is on the view.
Transparent
Transparency of the background (HDRI influences the scene, but it is not visible). This is useful when you want to swap HDRI for a different background in post-production.
Quick Access To Render Settings
Renderset shows a few render settings in the panel for quick access. All of these settings can be changed in Blender's native GUI. Since some are tweaked extremely often when using renderset we chose to provide a quick access GUI for them.
Engine
Select your desired render engine - Cycles, Eevee, LuxCore or Octane.
Render engines included in Blender
Cycles and Eevee are included in Blender. LuxCore and Octane are third-party optional renderers that you have to get separately.
Render Type
Select between rendering a Still Image or Animation.
Samples
The higher the number of sample passes, the more accurate lighting calculations are. More samples generally improves the quality of the render.
Resolution
Set the size of your output. Horizontal, vertical. The percentage allows you to play with the final resolution, while preserving the image ratio.
Save & Pack
Saves the original file, then packs all externally used data and saves the result in a separate file. This is useful for rendering on render farms. For more details see the render farms chapter.