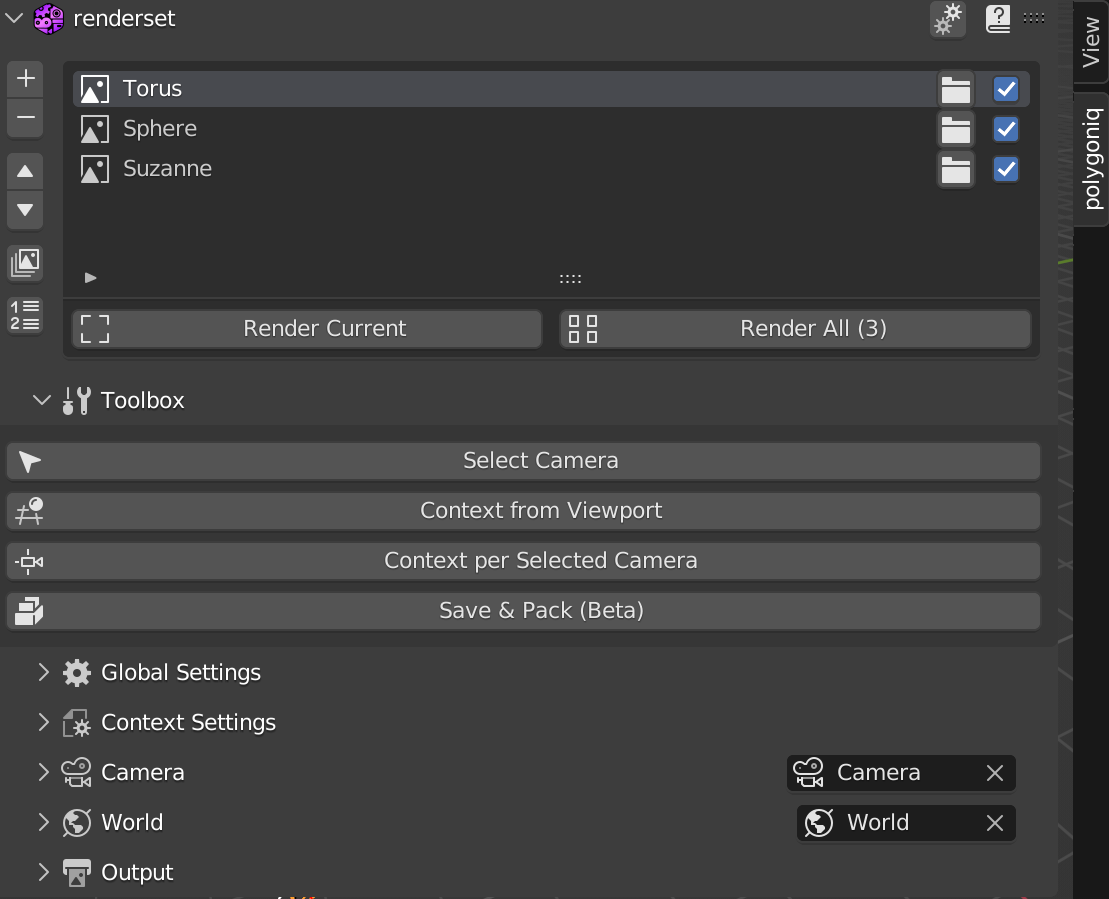
Panel Overview
The renderset panel is located on the right side of the 3D viewport window. It is the main way to
access renderset features. To access the side panel, press the N key on your keyboard and select
the polygoniq tab.
Info
If you have multiple polygoniq add-ons enabled, they will all be shown here.
Toolbox
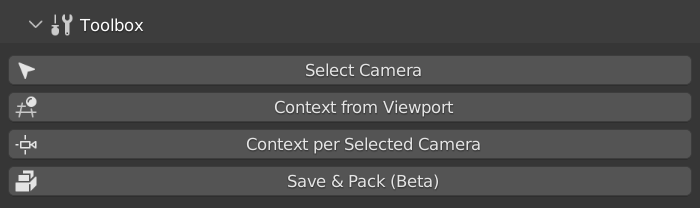
Select Camera
Operator that selects the active context camera.
Context From Viewport
Operator that creates new camera and context from your current viewport location.
Context per Selected Camera
Creates context for each selected camera.
Save & Pack
Saves the original file, then packs all externally used data and saves the result in a separate file. This is useful for rendering on render farms. For more details, see the render farms chapter.
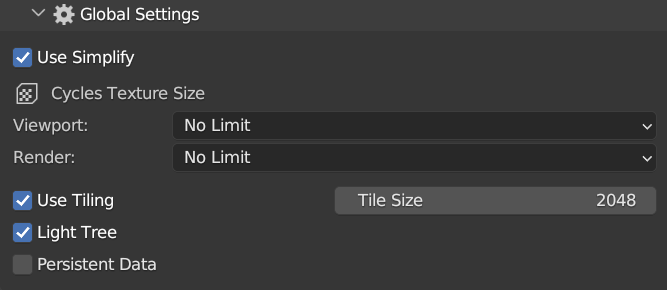
Global Settings
Options displayed here are applicable to all contexts.
settings may differ based on render engine
This panel shows a few global settings in the panel for quick access. All of these settings can be
changed in Blender's native GUI. Since some are tweaked extremely often when using renderset, we chose
to provide a quick access GUI for them.
Simplify
Scales down textures so that they are no larger than the values chosen. This can help reduce computer memory resources when rendering large scenes with huge textures.
Use Tiling
This value is used to control the size of the tile used for rendering. Decreasing the size reduces memory usage.
Light Tree
Use a light tree to more effectively sample lights in the scene, taking into account distance and estimated intensity. This can significantly reduce noise, at the cost of somewhat longer render time per sample.
Certain lighting properties are not accounted for in the light tree. These include custom falloff, ray visibility, and complex shader node setups including textures. This can result in an increase in noise in some scenes that make use of these features.
This feature is currently disabled for AMD GPUs on macOS.
Persistent Data
Keep render data in memory after rendering for faster re-renders and animation renders at the cost of extra memory usage while performing other tasks in Blender.
When using multiple View Layers, only data from a single view layer is preserved to keep memory usage somewhat under control; however, objects shared between view layers are preserved.
Context Settings

This panel shows a few render settings in the panel for quick access. All of these settings can be
changed in Blender's native GUI. Since some are tweaked extremely often when using renderset, we chose
to provide a quick access GUI for them.
Render Type
Select between rendering a Still Image or an Animation.
Engine
Select your desired render engine - Cycles, Eevee, LuxCore, or Octane.
Render engines included in Blender
Cycles and Eevee are included in Blender. LuxCore and Octane are third-party optional renderers that you have to get separately.
Samples
The higher the number of sample passes, the more accurate lighting calculations are. More samples generally improve the quality of the render.
Max Bounces
Maximum number of light bounces. For best quality, this should be set to the maximum. However, in practice, it may be good to set it to lower values for faster rendering. A value of 0 bounces results in direct lighting only.
View Transform
Change color management to achieve a different visual style of your render. You can choose from:
- Standard
- AgX (Blender 4.0 or higher)
- Filmic
- Filmic Log
- Raw
- False Color
Look
Manage the contrast settings of your scene.
Exposure
Used to control the image brightness applied before color space conversion.
Gamma
Extra gamma correction applied after color space conversion. Note that the default display transforms already perform the appropriate conversion, so this mainly acts as an additional effect for artistic tweaks.
Unless you know what you are doing, it's best to leave Gamma settings at 1
Resolution
Set the size of your output. Horizontal, vertical. The percentage allows you to play with the final resolution while preserving the image ratio.
Clamp Direct
This option limits the maximum intensity a sample from rays which have not yet bounced can contribute to a pixel. It reduces noise at the cost of accuracy. Setting this option to 0.0 disables clamping altogether. Lower have a greater affect (dimmer samples) on the resulting image than higher values.
Clamp Indirect
The same as Direct Light, but for rays which have bounced multiple times.
Camera
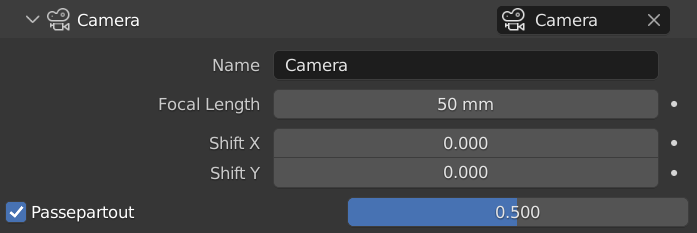
This panel shows some camera settings for quick access. All of these settings can be
changed in Blender's native GUI. Since some are tweaked extremely often when using renderset,
we chose to provide quick access GUI for them.
We will go over the basics of some of these. Please check out the Blender camera documentation for a more in-depth explanation.
Focal Length
Changes the distance between the optical center of the lens and the camera's sensor. This affects the field of view and zoom. Longer focal lengths result in a smaller field of view (more zoom), while short focal lengths allow you to see more of the scene at once (larger field of view, less zoom).
Shift X/Y
Moves the field of vision of your camera, without changing perspective. Allows for the adjustment of vanishing points. Vanishing points refer to the positions to which parallel lines converge.
Passepartout
Changes the opacity of the darkened overlay in camera view.
World

This panel shows a few world settings in the panel for quick access. All of these settings can be
changed in Blender's native GUI. Since some are tweaked extremely often when using renderset, we
chose to provide a quick access GUI for them.
Transparency
Transparency of the background (HDRI influences the scene, but it is not visible). This is useful when you want to swap HDRI for a different background in post-production.
Output
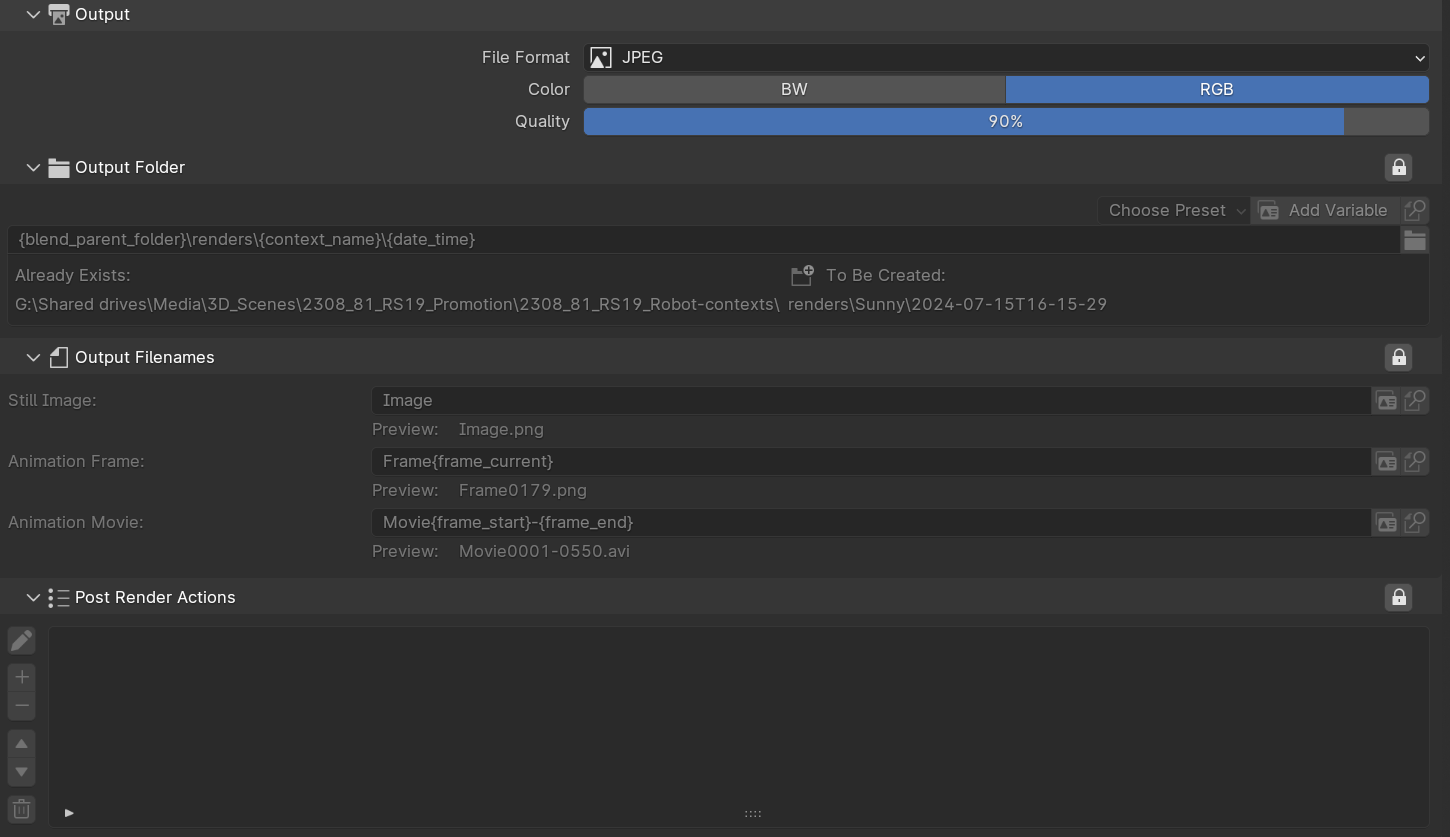
This panel shows a few output settings in the panel for quick access. All of these settings can be
changed in Blender's native GUI. Since some are tweaked extremely often when using renderset, we
chose to provide a quick access GUI for them. Please check out the
Blender output documentation
for an in-depth explanation.
Outputs & Post Render Actions
By default the values are locked and show the output settings and post render actions defined in
preferences to be used by all render contexts. If you want to override the values for the selected
context, use the lock icon

For more information visit Render Output Settings and Post Render Actions.